I raised concerns in my review of the Palm Pre that the build quality was a bit suspect and I was disappointed to find my little electronic sidekick feeling the worse for wear yesterday. I had been listening to music with my headphones plugged into the jack on Sunday night but on Monday morning when back at work I found the earpiece speaker no longer operating leaving me unable to hear incoming callers. Using the speakerphone option or plugging headphones back into the jack would allow me to once again enjoy the sound of my boss yelling some choice swearwords at me, but removing the headphones had the effect of leaving the Pre sadly silent again.
I figured pretty quickly that it would likely be a problem with the headphone jack and the Pre, bless it, just wasn't being told by the jack that the headphones had been removed. Headphone jacks haven't changed much since I pulled apart radios as a kid and they still work in the same basic way, i.e. when you insert the headphone plug it breaks a normally-closed contact within the jack socket cutting off the electrical path to the speaker, routing it instead through the 'phones. It was probable this contact hadn't closed when I had unplugged my headphones after dancing around the kitchen the night before, perhaps because some debris or dust had gotten into the jack and between the contacts or the springyness of the contact wasn't good enough to close properly and complete the circuit.
I hoped to release the contact without surgery by plugging/unplugging the headphones and blowing any crap out of the Pre's jack-hole with an air enema but all to no avail. Being only three months old I could send it back to O2 for a replacement but I would have to reinstall all my apps and preferences on the replacement device and anyway, I just couldn't be arsed. I knew an evening with some screwdrivers and a pot of coffee would probably yield a repair and I figured I owed it to my little electronic best-friend seeing as it normally provides me with so much while asking so little.
If you are attempting the same, please heed these usual words of warning - you will invalidate your warranty, it's a fiddly repair that can easily go wrong and I provide this page of nonsense for information only. Just 'cos it worked for me doesn't guarantee the same results for anyone else! Please review all steps and tools required before attempting to copy the shenanigans on this page.
Before we start, here's a handy tip, if you have a Touchstone charger, it's magical magnetic powers can be used to hold the fiddly screws that need to be removed, stopping them rolling off into the carpet!

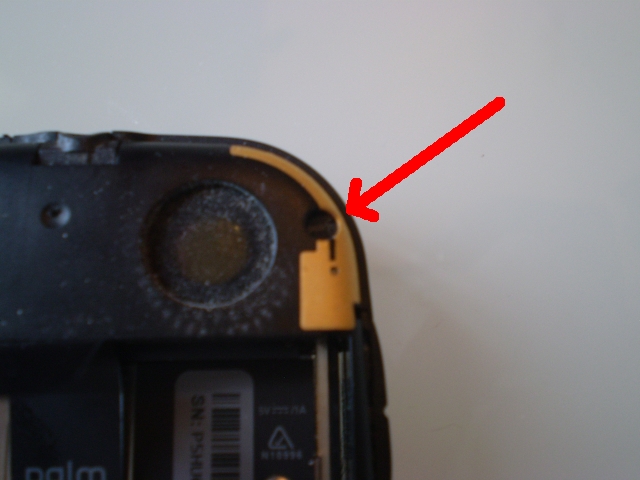
Step 1. Remove the back cover and battery. Take a close look at the screw near the speaker and you'll notice it has an anti-tamper Palm sticker covering it. You won't be able to access this screw without removing the sticker and you won't be able to remove the sticker in one piece. Kiss your warranty goodbye once the sticker is gone!
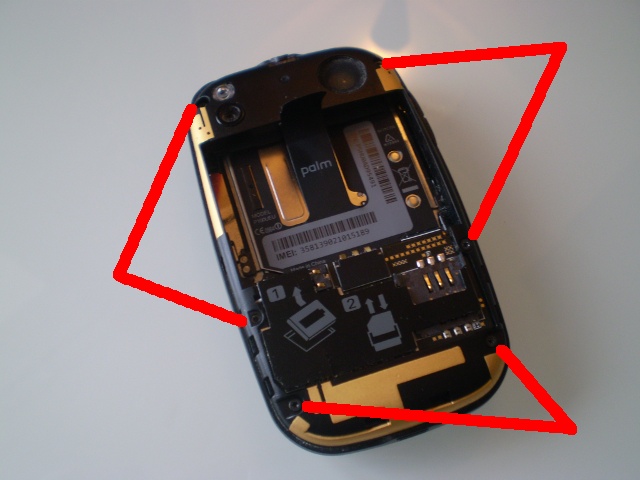
Step 2. You'll need a little Torx screwdriver to remove the six screws.
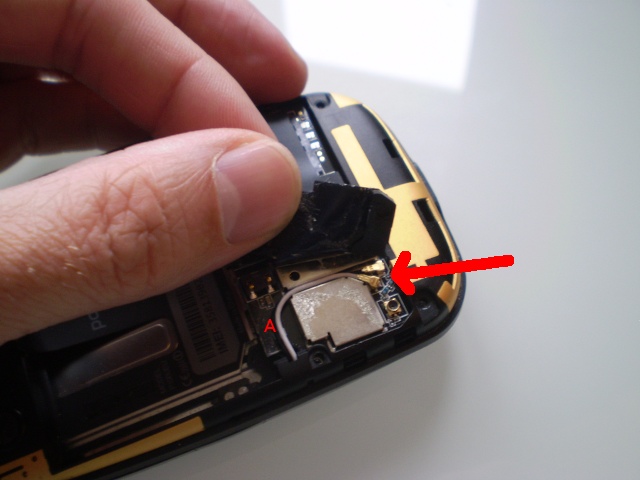
Step 3. Peel back the plastic covering the two antenna connections. I notice some models have their connections at point 'A' while my EU variant has them lower down. These two wires simply unclip from the PCB.
Step 4. Here's where it gets a little tricky. Six retaining lugs hold the casing in place. Work around each in turn to prise the casing apart....

Step 5. ...be careful as the casing is still attached by a small ribbon cable but it should be possible to prise it up...

Step 6. ...and once prised up you can open it out while leaving the (arrowed) ribbon still connected to the attached volume buttons.

Step 7. Peel away the sticky sponge that surrounds the speaker and headphone jack.

Step 8. Insert a flat jewellers screwdriver between the jack socket and the outer rear casing...

Step 9. ...and lever the screwdriver to force the jack socket out of the surround.
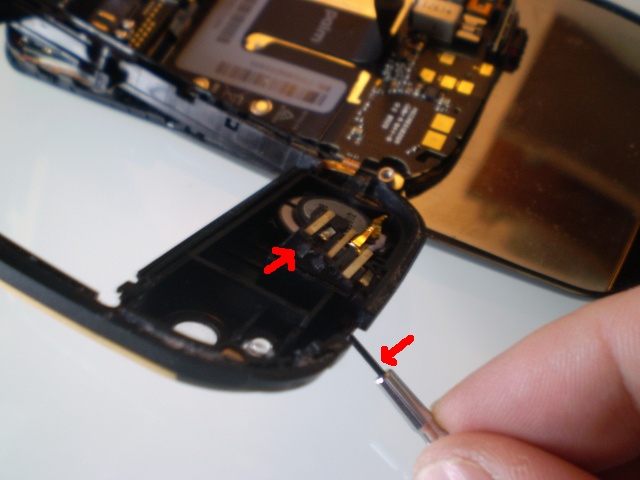
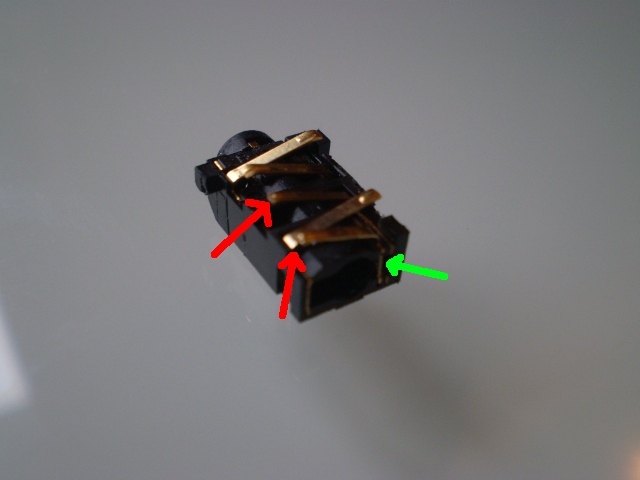
Step 10. Here it is, the pesky jack socket exposed! The bottom contact should normally be connected to the middle contact (both arrowed red) by a springy bit of metal just inside the jack (arrowed green). When headphones are inserted, the springy contact is forced outwards breaking this connection and disconnecting the electrical path to the earpiece speaker. Once headphones are removed, the springy contact should close and reopen the electrical pathway to the earpiece. To get my jack working I checked all contacts were good and blew out any dust and debris that was within. A continuity tester was used to check for correct operation both with and without headphones inserted before I attempted reassembly. If you have a similar problem but you're unable to repair your jack you could, I suppose, permanently short out the two red contacts to re-enable your earpiece although your days of using headphones would be numbered.
To reassemble, just work back through the steps in reverse. Ensure all screws are fully tightened before testing as the casing needs to be properly shut in order for the jack socket to be in proper contact with the PCB.
So the Pre lives to fight another three months! In your face doubters! Shame there are only another four people in the world using the friggin' thing.
