You know, it's pretty much ten years to the day since I bought my PS2, having made a special trip over to Coventry to pick one up from a branch of Currys which held limited stock of the things. The games I got with it were underwhelming and my PS1 remained the dominant console for the first year until finally GTA3 arrived on the scene and showed off what the PS2 could really do while stealing the crown from the Driver series of games for the cops & robbers thrills and spills that were my bread and butter back then.
I've been thinking of hooking the old girl up and playing some of the classic games I never got around to completing such as SOCOM 1&2, The Getaway and Mercenaries which are all in the collection and gathering dust. Of course, nowadays I have a PS3 sitting in the living room but I find there isn't much I want to play on that and it spends most of its time acting as a media server rather than engaging in any gaming glory. Besides, the women of the house hijack the living room TV most evenings but by hooking up the PS2 to the LCD TV in the bedroom I can get away from whatever chavvy talent show they happen to be watching on ITV and spend some quality time in the bedroom playing with myself. So to speak.
During the transfer to the bedroom, I couldn't resist cracking the bugger open to see what makes it tick. I haven't looked inside the thing over my decade of ownership and I wanted to take a closer look at the video chipset to see if I could do anything more than a composite video hook-up (no such luck unfortunately). There are different flavours of PS2, mine being model SCPH-30003, one of the older bricks with a hard-drive bay and firewire. Even this model had variants so some steps or layouts may differ between my PAL UK box and anyone elses console. Later units dropped Firewire and were slimmed down further by losing the hard drive bay and combining the separate CPU and GPU into a single chip. If you're pulling apart anything other than a UK SCPH-30003 then this page may not be for you.
Of course, the usual disclaimer. Review all steps before you begin, don't attempt if not confident with electronics or your ability to use a screwdriver, you'll void any warranty you may still have, blah blah. Remember, this is not an official guide, just a page detailing how I happened to disassemble my own PS2 console. What you do with yours is up to you!
Step 1. Remove the four rubber feet and six square plastic caps to expose screw heads underneath. Remove these screws.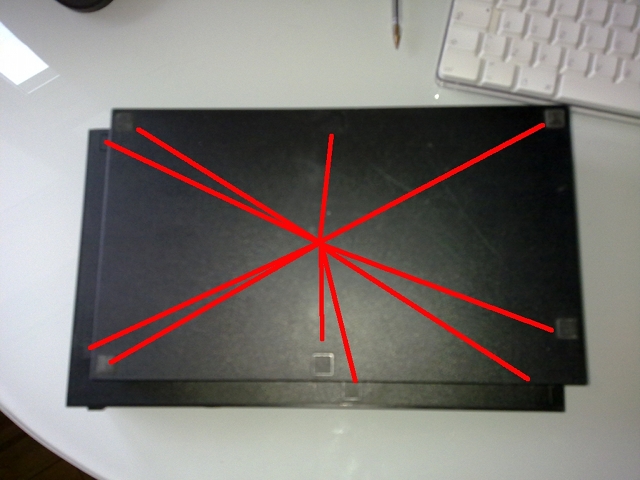
Step 2. Remove or cut the warranty sticker on the rear to allow the case to separate. I doubt *anyone* still has a warranty on one of these unless you've bought a unit second hand and some kind of limited cover has been included.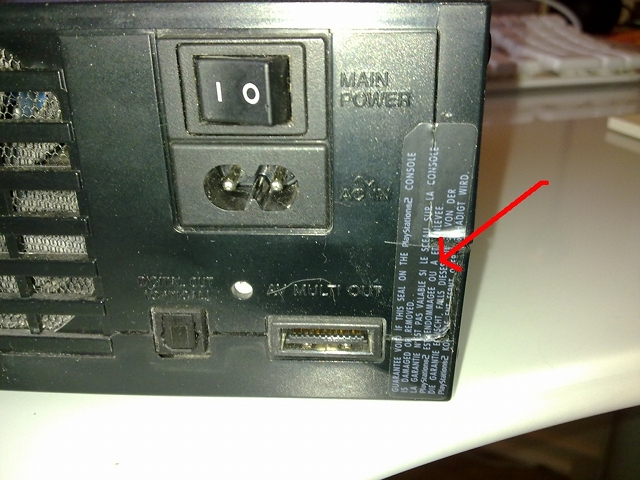
Step 3. Carefully lift up the top cover and flip it over. Beware of the fragile ribbon cable that connects the power and eject buttons. The optical drive and PSU board are now exposed.
Step 4. To remove the PSU board, first take out the four screws (shown already removed in this picture).
Step 5. The PSU board can now be lifted clear. Four long metal prongs connect to the board at the rear near the fan and the board has to be coaxed off these prongs before it is free. The AC socket also lifts out with the board.
Step 6. Plop the top cover back on and flip the unit over. The bottom half of the casing can now be lifted off.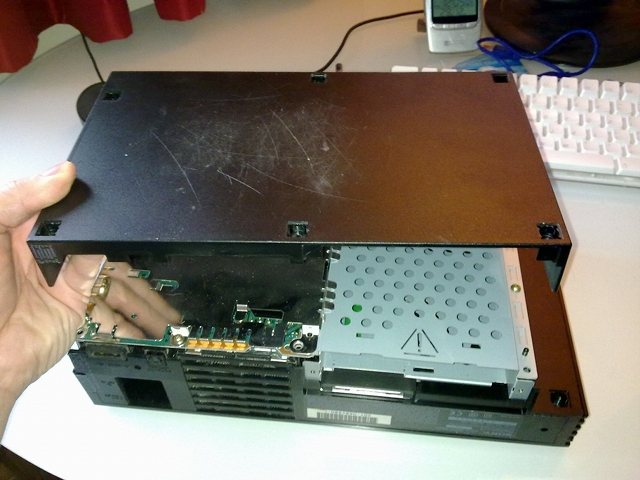
Step 7. Remove the two screws that hold the left and right shielding plates in place.
Step 8. Lift off both the left and right shield plates.
Step 9. Carefully unclip all ribbon cables and the fan power cable (all arrowed).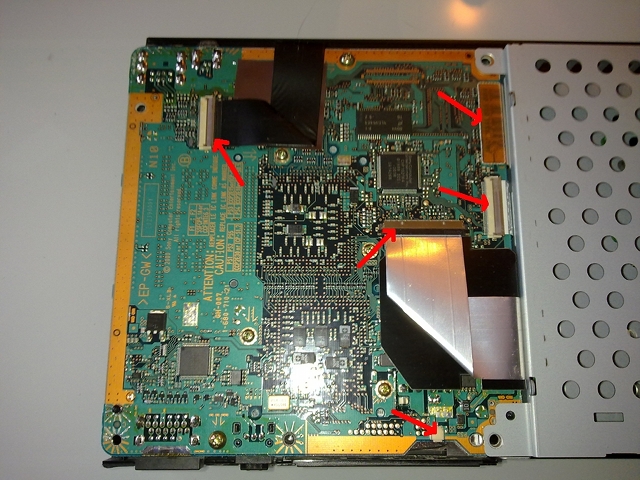
Step 10. Remove the six screws.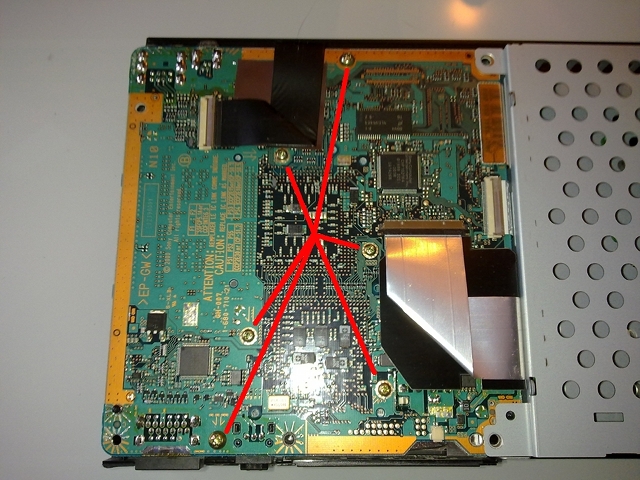
Step 11. Lift out the drive bay chassis.
Step 12. The motherboard PCB and heatsink can now be lifted out. A connector attaches it to a daughterboard and the prongs that run through to the PSU PCB also hold the motherboard in place so some gentle coaxing will be required to lift the board clear.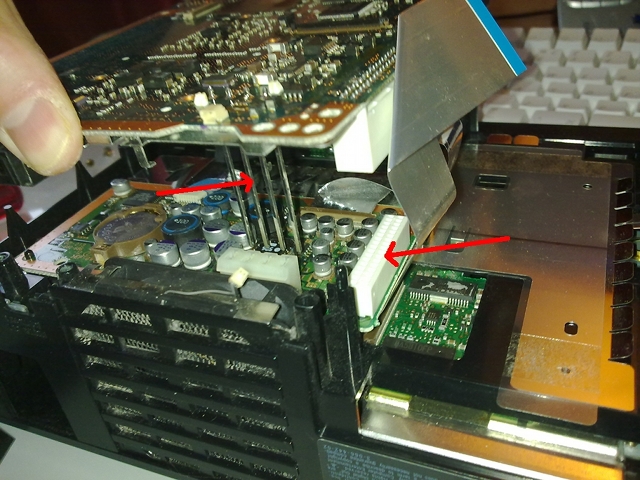
Step 13. Lift the heatsink off the motherboard to expose it.
Step 14. Thar she blows! The EE (Emotion Engine) CPU and the GS (Graphics Synthesiser) GPU can both be seen here.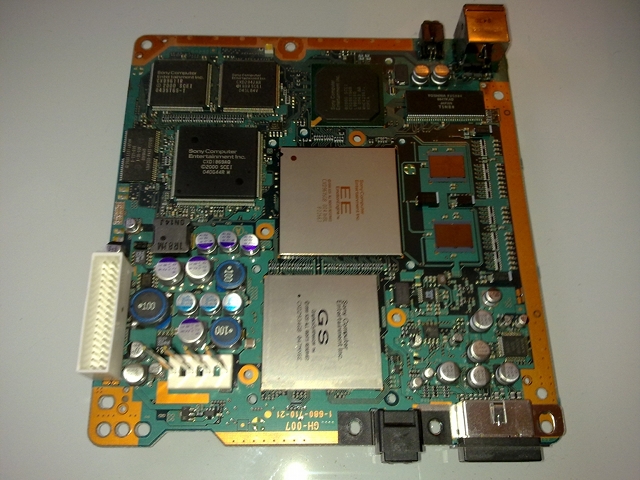
Reassembly is the reversal of the above.
